The Process.
Below we will take you step by step through the process of creating an image we
used for this site. This is a basic example. So many things can be done it's hard to know
what's real. We use many of these same processes to restore old photographs for clients.
|
|
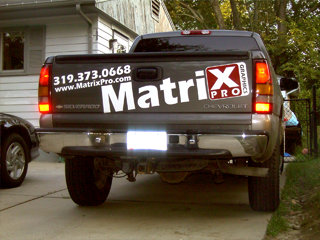
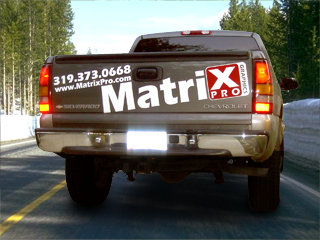
Step 1: We began with a photo of the truck that was taken in from of a house during the late evening. The reason for late evening is we wanted the tail lights to stand out. In bright daylight conditions they would have looked almost black. A flash was used to help them glow. |
|
|
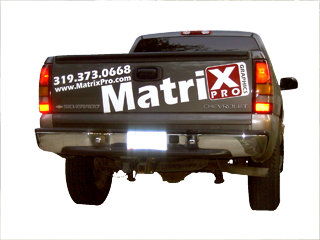
Step 2: The entire background was removed from the image. This is by far the most time consuming step. |
 |
|
Step 3: We needed something in the background. An image from a stock photo collection was picked that matched the prospective of the truck in the photo. The image was digitally layered in behind the truck. |
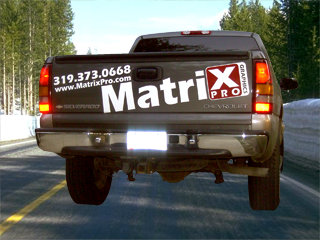 |
| Step 4: The lighting on the truck wasn't the greatest so we brightened the truck body and added an overall yellow/orange highlight. This helps give the truck a warm effect of sunlight shinning on it. Next we enhanced the red in the logo on the decal to better match the original logo. Finally the undercarriage of the truck was then darkened. |
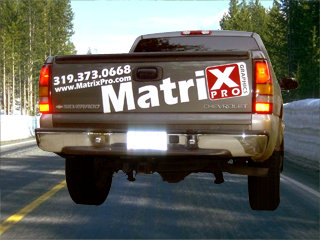 |
| Step 5: It's amazing what a little shadow will do. A layer if shadow was placed between the truck and the background image. This really ties the truck to the pavement. |
 |
| Step 6: The final step was more for effect. The scenery image in the background was blurred. Instead a constant blur, it was blurred very heavy at the top and not at all at the bottom. |
 |
|
|
| Compared to the original it's quite an improvement. |
|
|